Last updated on February 13, 2020
How to Manage and Release Excel files on GitHub: GitHub Actions (Part II)
Posted by Felix Zumstein - Comments
It’s been a while since Part I of this blog post series. Part of the reason is that I wanted to wait with Part II until GitHub released their native continuous integration system called GitHub Actions. Well, that happened in November 2019 so it’s about time we get this moving!
Overview
- Recap
- Preview: What do we want to achieve?
- GitHub Actions
- Automatically upload a new release
- Conclusion
Recap
This is a multi-part blog post:
- Part I highlights 6 basic rules that will let you avoid the most common rookie mistakes that we see with a lot of users who are new to GitHub.
- Part 2 (this blog post) is about automating the release process.
- Part 3 will be about branching, pull requests and approvals.
We assume (very) basic Git knowledge here i.e. you should know how to commit and push a file to GitHub.
In Part I of this blog post series we learned a few best practices when managing your Excel files with Git. Two of the suggestions were:
- No more version description in the file name
- Release a version by tagging it
We basically learned that we shouldn’t name our files in the mybook_v2_edits_Bob.xlsx style anymore but instead commit new versions of mybook.xlsx without any version description in the name. Git does the job for us and keeps track of the timestamp and author and we can use Git commit messages to describe (in much more detail) what changed.
We then moved on by saying that whenever we release a new version of our Excel tool, we should use Git to tag the repository so that we can go back anytime to the released state of the Excel workbook by doing a git checkout <tag>.
We also pointed out that if you would like to deploy your Excel file to your end users, you might want to re-introduce a version tag in the actual file name. The important part here is that this does not happen within Git as we follow the advise from above and never change the file to include something like _v1. Instead, you would take a copy of the file, rename it into mybook-1.0.0.xlsx outside of Git and finally upload it to the download or artifacts page of your Git provider. In GitHub, this is called “Releases”.
Now, and that’s where we left it in Part I of this blog post series, doing the rename/upload part manually works, but it’s very cumbersome and error prone. You could upload the wrong file, introduce typos or inconsistencies in the naming convention and you always have to remember to actually do it. Let’s see how we can fully automate all this!
Preview: What do we want to achieve?
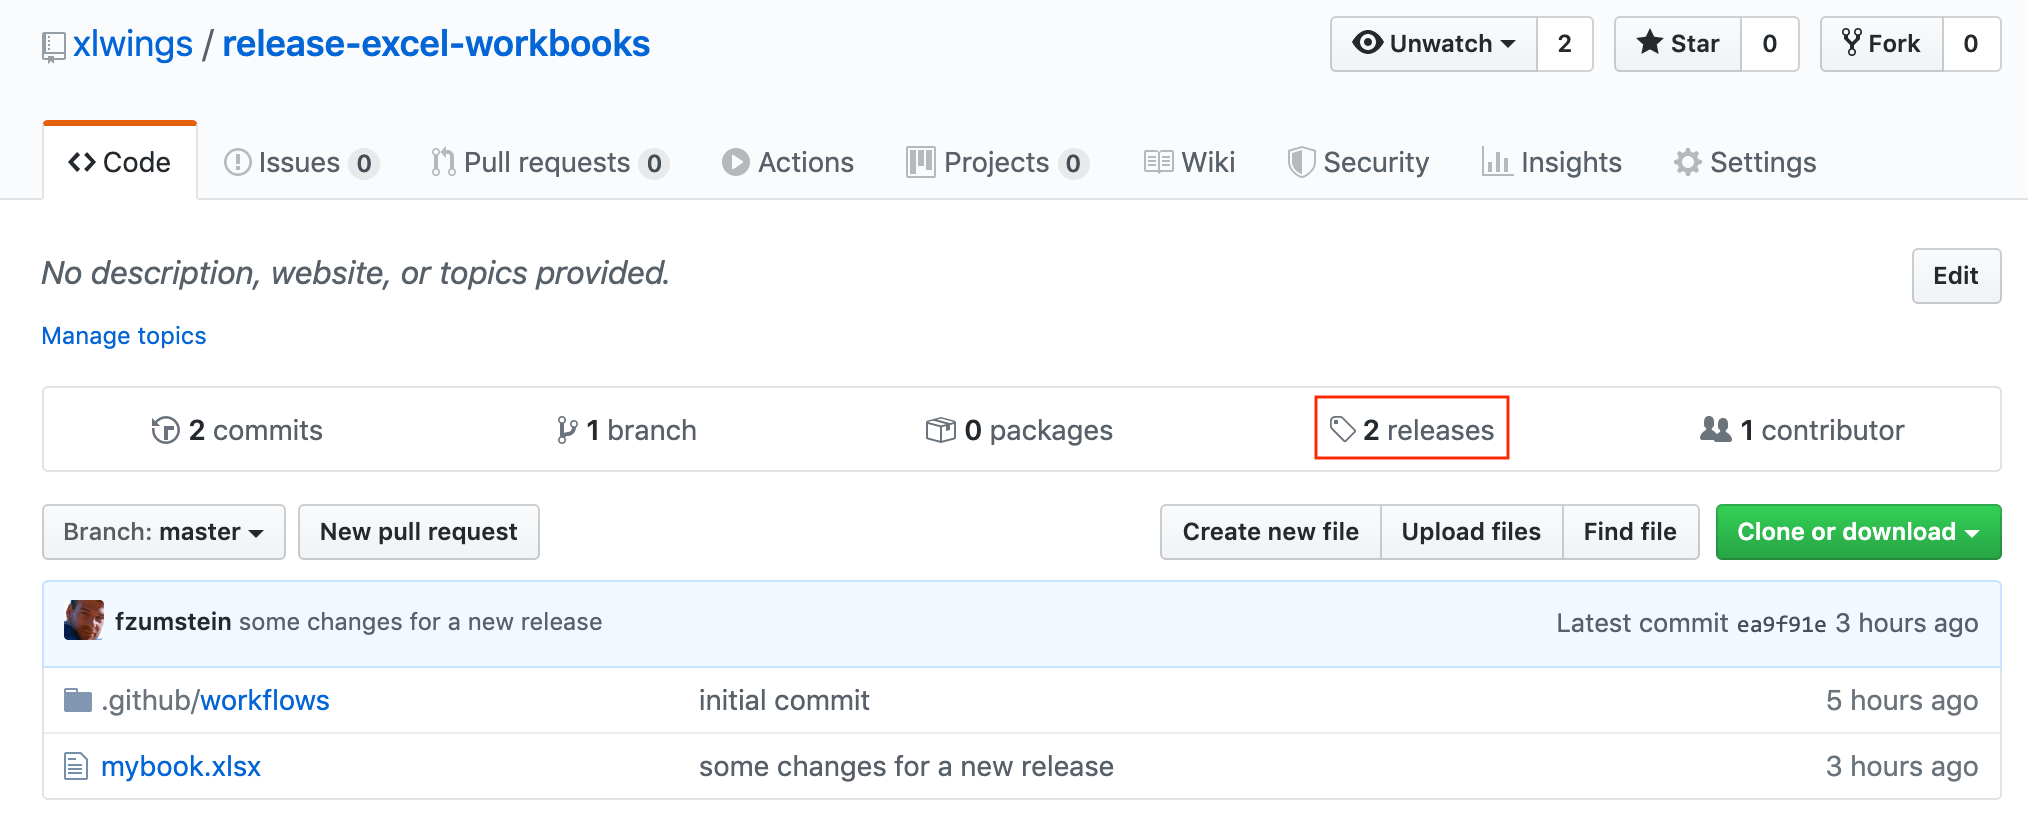
Let’s have a quick look at what we’re trying to achieve here. We start by creating a new release on GitHub. To get there, click on x releases:
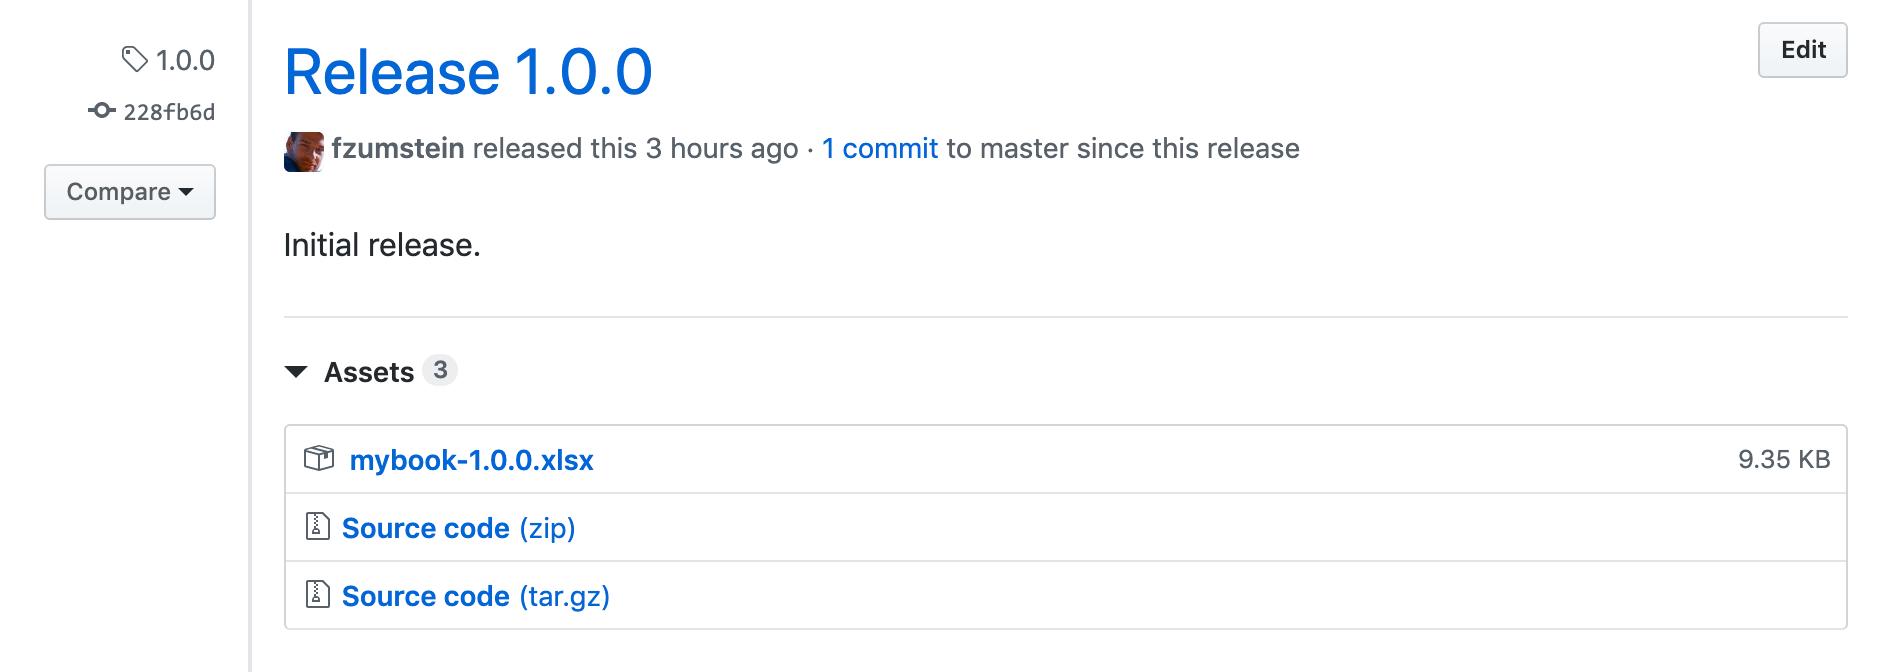
Now we can add the tag 1.0.0, a title Release 1.0.0 and release notes Initial release.

GitHub will automatically create a new Git tag when we click the green Publish Release button.
And here is the missing part: To finalize our release, we want the Excel file with the version tag in the name mybook-1.0.0.xlsx to magically appear as a downloadable file from the release page:
Let’s see how we get this to work!
GitHub Actions
As GitHub describes it: “GitHub Actions makes it easy to automate all your software workflows”. While GitHub Actions is a relatively new addition to the GitHub platform, is has been around for years with other vendors (GitLab and Bitbucket call them Pipelines) and even before GitHub Actions it was easy enough to use a 3rd party service that could be integrated with GitHub. More generally, the concept is known as continuous integration/continuous deployment.
So what does GitHub Actions do? Github Actions is basically a script that automatically runs whenever something happens in your Git repo (most commonly when you push a new commit). GitHub Actions is free for open-source repos and private repos have a generous allowance of free build minutes. It’s also very nice that you can choose to run your script on all major platforms: Ubuntu, Windows and macOS.
Bottom line: This sounds perfect to automate our little release task!
Automatically upload a new release
To activate GitHub Actions, all you need to do is create a yaml file within the following directory .github/workflows (you will need to create it in your Git repository). In our sample repo we call it main.yml:
name: Release Pipeline

on:
  release:
    types:
      - created

jobs:
  build:
    runs-on: ubuntu-latest
    steps:
      - uses: actions/checkout@v2
      - name: Upload Excel file to GitHub Release Page
        if: github.event_name == 'release'
        uses: actions/upload-release-asset@v1.0.1
        env:
          GITHUB_TOKEN: ${{ secrets.GITHUB_TOKEN }}
        with:
          upload_url: ${{ github.event.release.upload_url }}
          asset_path: ./mybook.xlsx
          asset_name: mybook-${{ github.event.release.tag_name }}.xlsx
          asset_content_type: application/zip
The only two settings that you’ll need to customize for your own repository are asset_path and asset_name: Make sure to change mybook to the name of your actual Excel file that you want to release. And that’s really it!
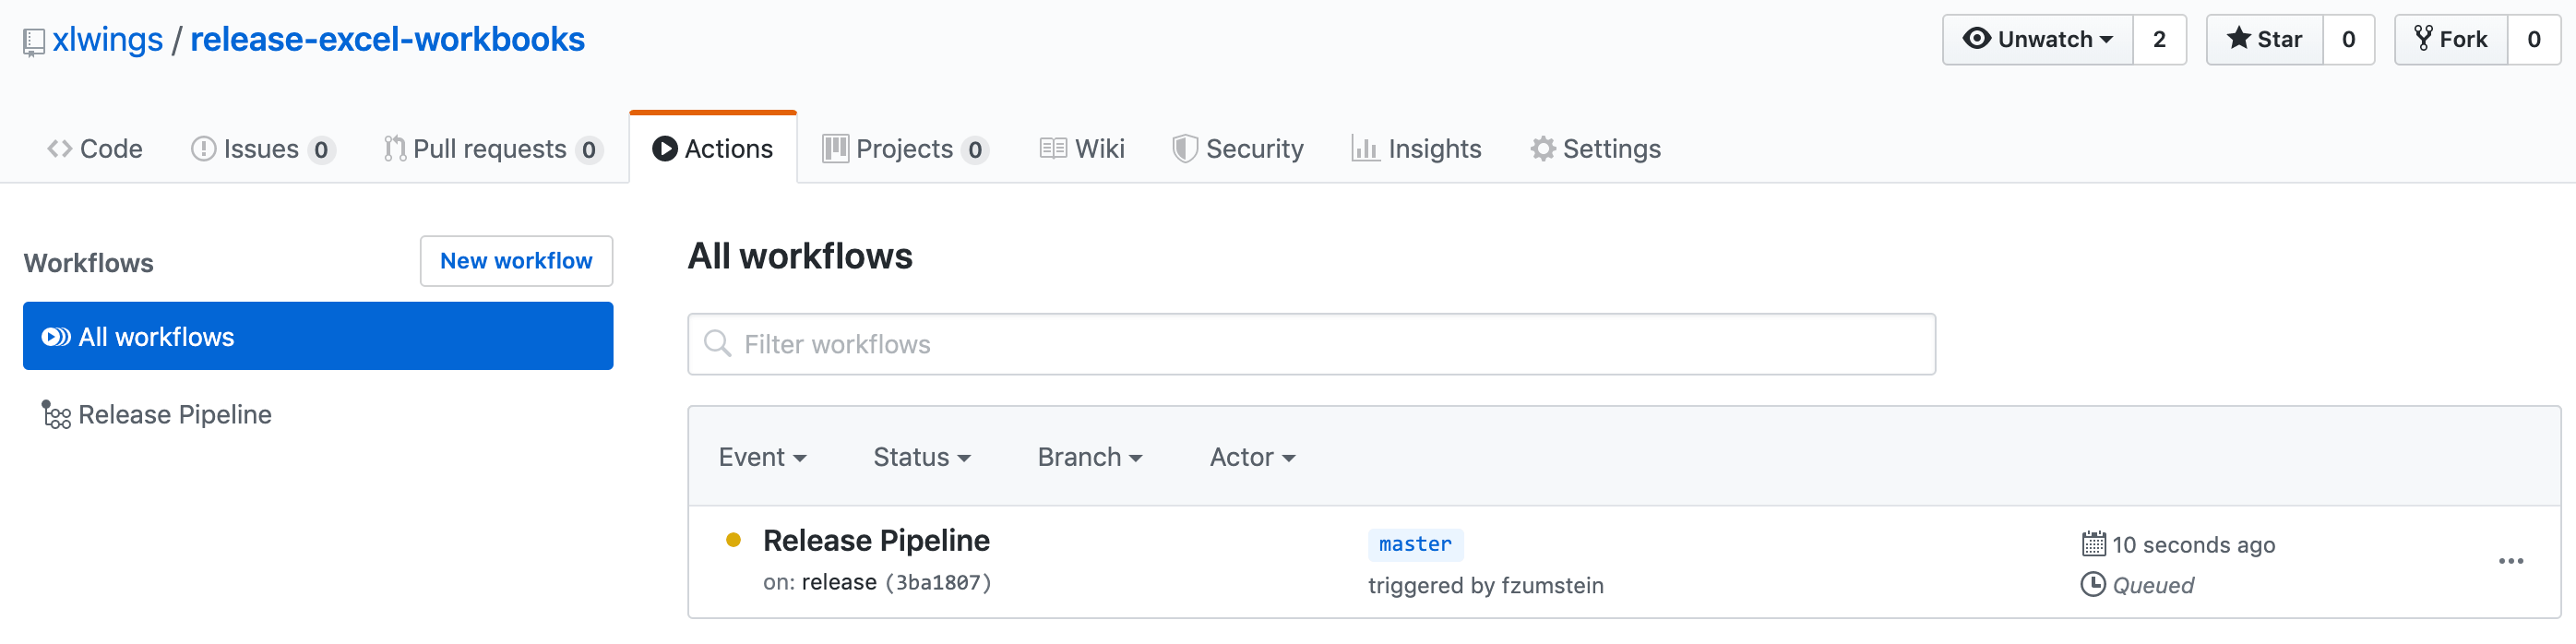
After creating a new release, you can follow the progress of your pipeline by clicking on the Actions tab:
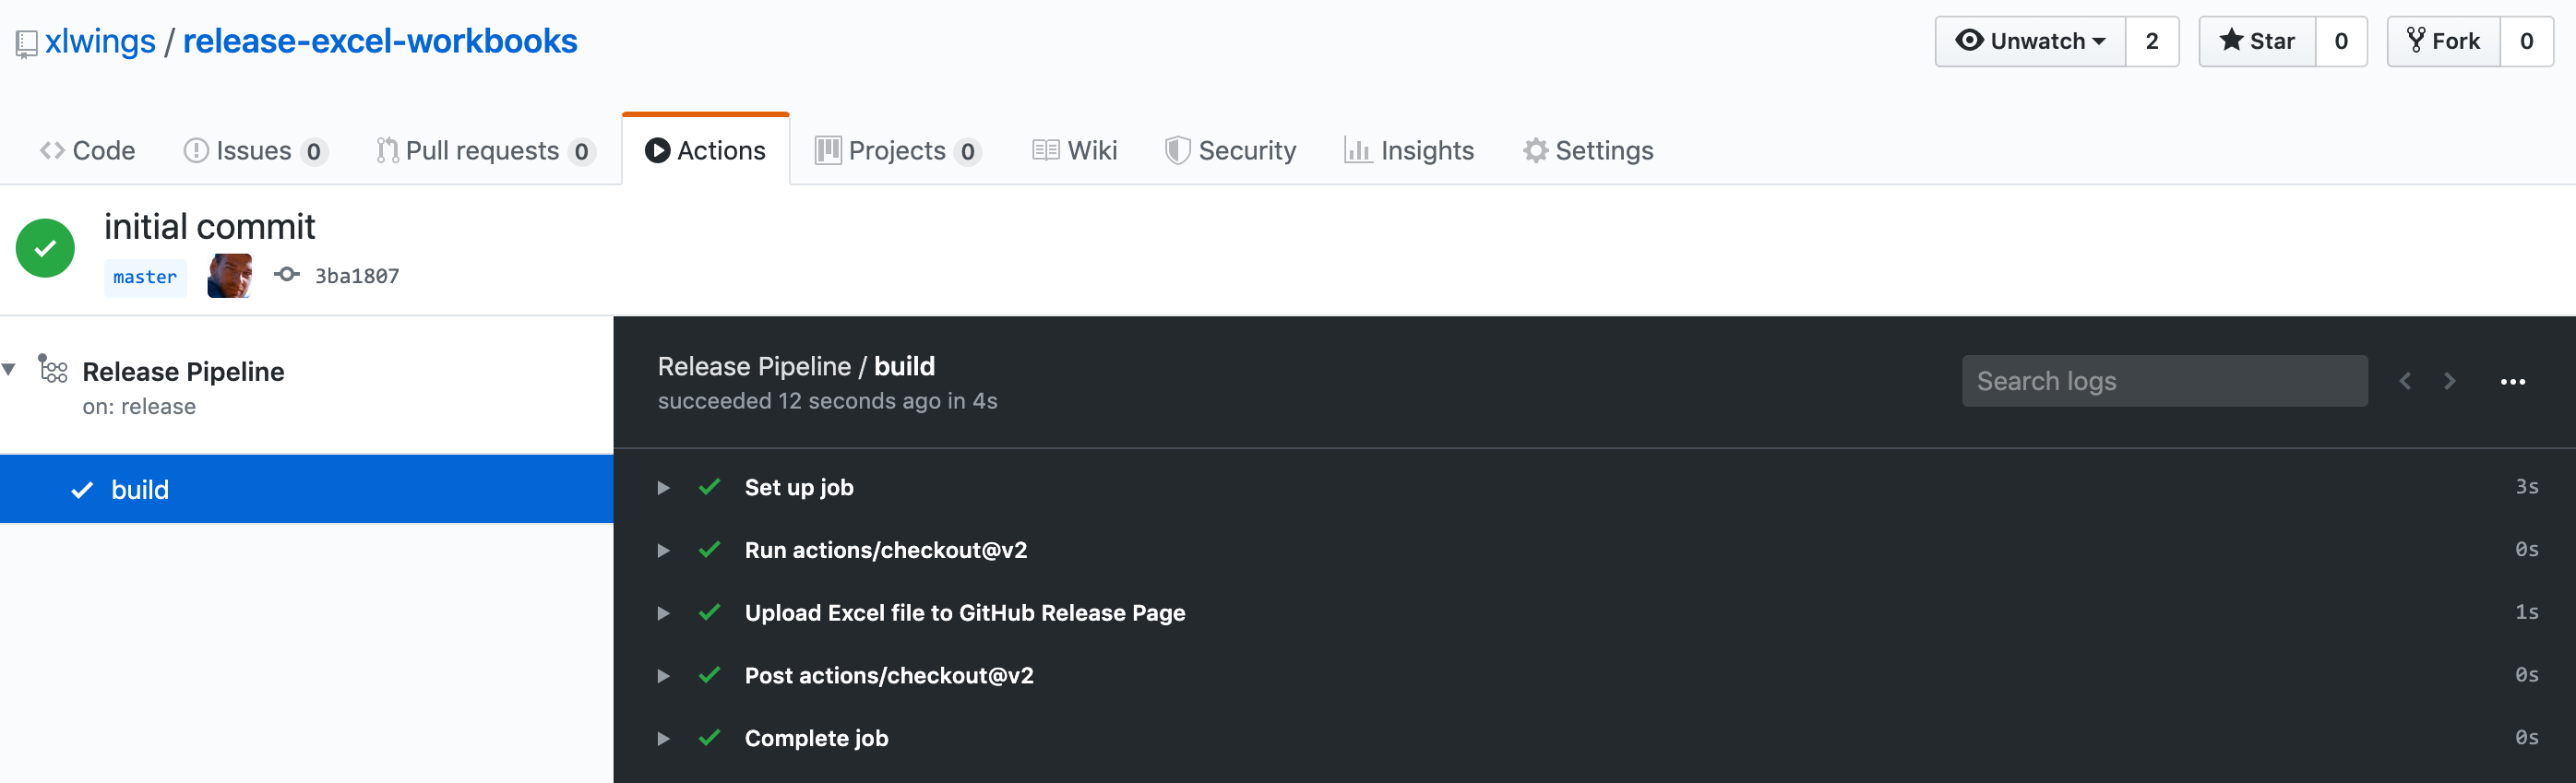
Click on Release Pipeline and you will get access to the detailed logs of each step (you can click on the arrow of each step to expand):
If you want to know what happens exactly, read on as we’re going through the yaml step-by-step:
- The first section
ondefines when this script runs. In our case, this happens every time someone creates a new release on GitHub. If you’d like to perform an action every time you push a new commit instead, you would useon: pushinstead. - We only run one
jobcalledbuild. Eachjobruns in an environment defined byruns-on. As you can see, I am using Ubuntu here as this is the system I am most familiar with (and it also happens to be the cheapest option if you run builds on your private repos). But otherwise you could also choosewindows-latestormacos-latest. - With
stepsyou define your tasks within a job. We only need two steps to achieve what we want:- The first one is a one line plug-and-play building block provided by GitHub:
actions/checkout@v2. It will simply check out our repository so that the next step can access our files. - The
nameof the next step makes it easy to follow the progress in the Actions tab. Theifcondition is not strictly required here as we are currently running the action only when you release, but if you’d ever extend the script to do other stuff every time you push, this will make sure that you only upload the file if the workflow was triggered by a release. Again, we’re using a predefined plug-and-play action calledactions/upload-release-asset@v1.0.1. Note that GitHub sets thesecret.GITHUB_TOKENautomatically so no need for us to do anything else besides writing this line of code. And finally, underwith, we set the parameters that theupload-and-release-assetaction needs to know in order to upload the right file with the right name to the correct release page. We make use of environment variables that are automatically available to us via${{ }}syntax to get access to theupload_urlandtag_name(Git tag).
- The first one is a one line plug-and-play building block provided by GitHub:
Conclusion
GitHub has released a fantastic continuous integration/continuous deployment platform with a generous free offer. Easy things are easy to do so there’s no reason why you shouldn’t start using it today to automate your tasks (whatever they may be).
Do you want to email your spreadsheet to certain people upon release? You can do that. Or do you want it to be stored on a specific location on your shared drive? You can do that, too (but you’ll need to host the GitHub Actions runner yourself).
Keep in mind that GitHub Actions is just one example of a continuous integration/continuous deployment platform and the concepts shown will work exactly the same on all the other available platforms like GitLab, Bitbucket or Azure DevOps (but the syntax and setup will slightly differ).