Last updated on February 5, 2019
How to Manage and Release Excel files on GitHub: A Primer (Part I)
Posted by Felix Zumstein - 1 Comment
We have all been there, haven’t we? Then, one day, you swear to yourself to stop this version madness once and for all and decide that you are going to move all your Excel workbooks to GitHub (or any other Git service like BitBucket or GitLab). After all, important spreadsheets deserve proper source control.

So far so good, but how is GitHub different from a shared drive and what do you need to change in order to use the platform correctly with Excel files?
This is a multi-part blog post:
- Part I (this blog post) highlights 6 basic rules that will let you avoid the most common rookie mistakes that we see with a lot of users who are new to GitHub.
- Part 2 is about automating the release process.
- Part 3 will be about branching, pull requests and approvals.
We assume (very) basic Git knowledge here i.e. you should know how to commit and push a file to GitHub.
Table of Contents
- No more version description in the file name!
- Make use of Git commit messages
- Release a version by tagging it
- Get approvals
- Diff, diff, diff
- Configure Git to work better with Excel
- Conclusion
No more version description in the file name!
First and foremost you need to get rid of all the _v1, _20190205 or final_final expressions in your workbook name before you commit it to Git. Git does the versioning for you so you don’t have to.
Make use of Git commit messages
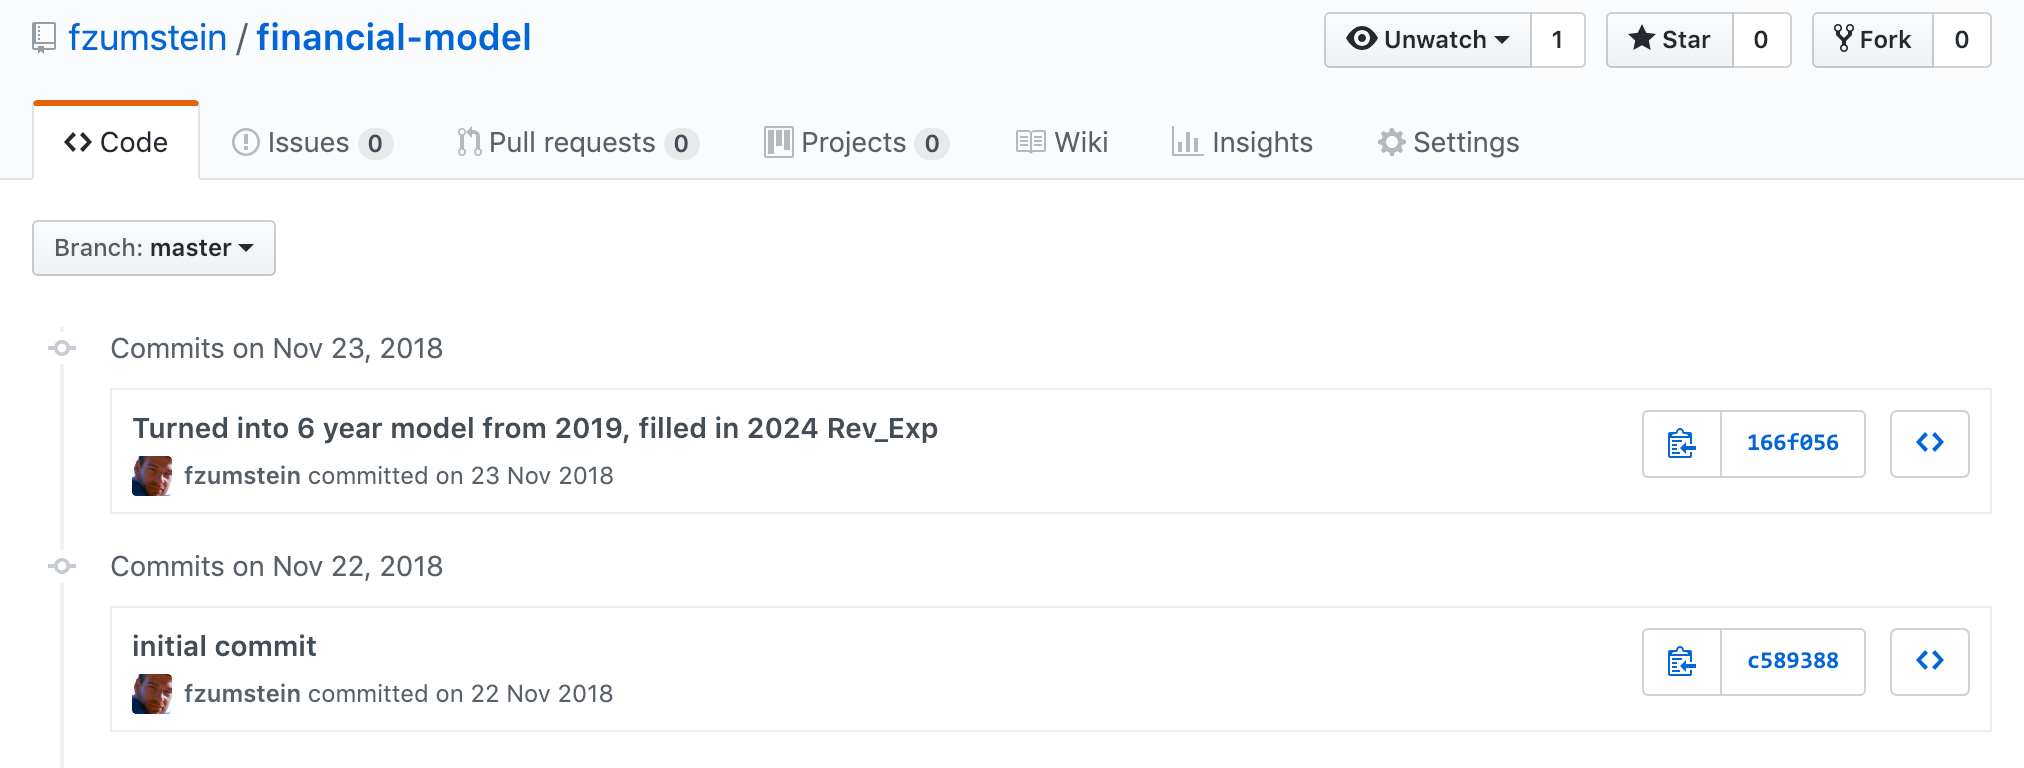
Instead of giving your files meaningless timestamps or version numbers, you can describe your changes in plain English (or whatever language you prefer) by using Git commit messages. This will allow you to see quickly where a certain change has happened if you ever need to rollback or search for a bug. It’s also a great way of letting your co-workers know what you are working on.
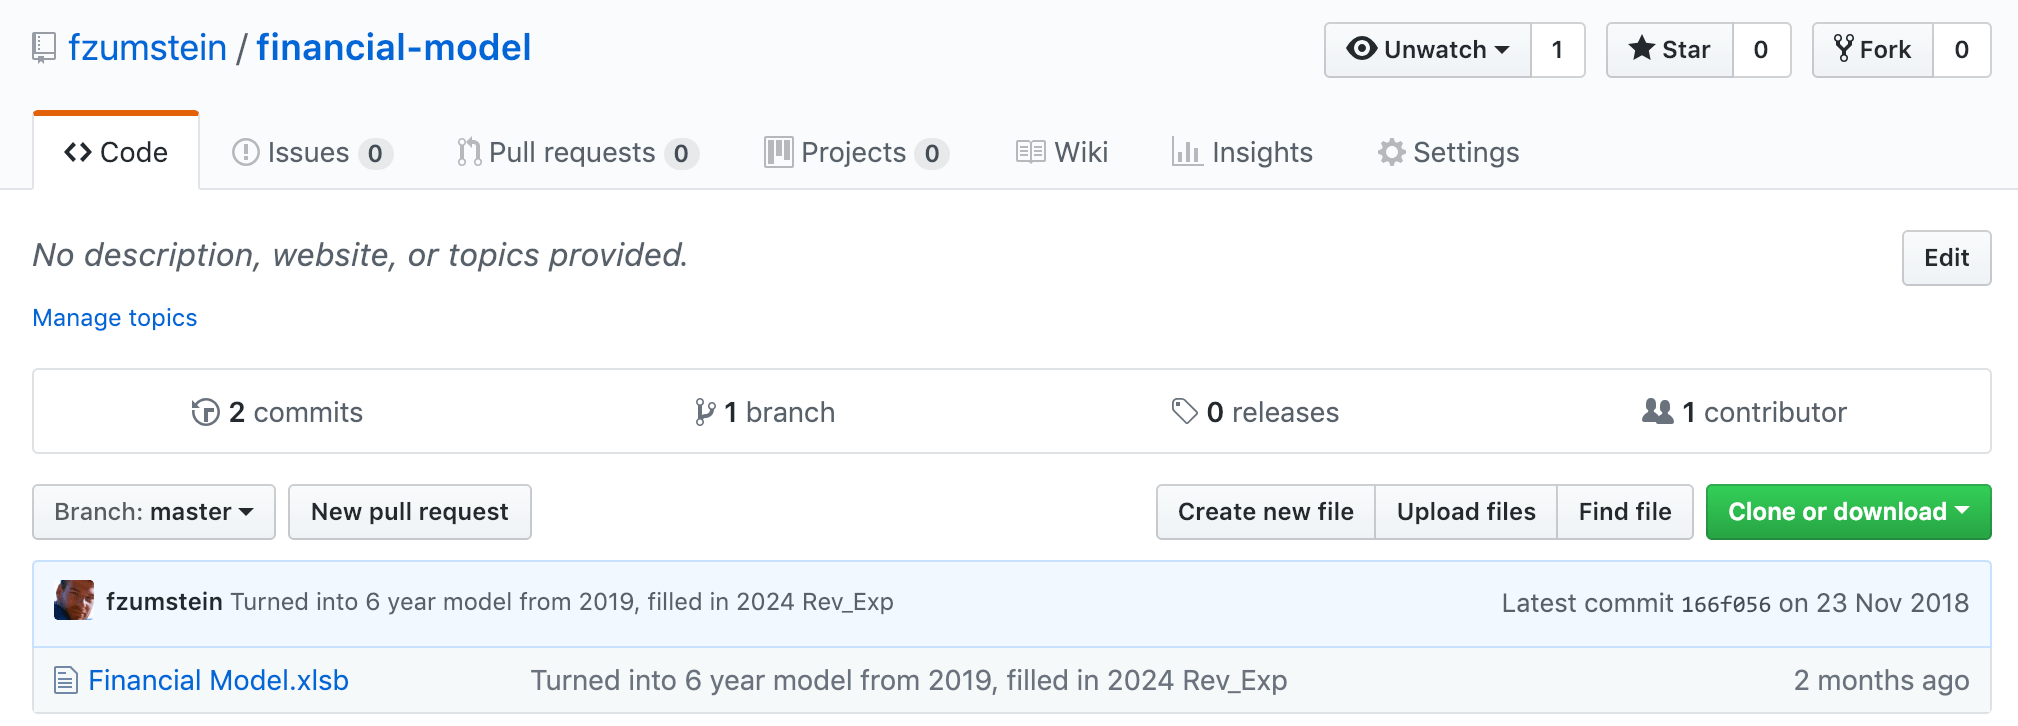
By clicking on 2 commits in the screenshot above, you will be taken to the commit history where you can see Git’s version number, called commit hash (e.g. c589388), the author of the change as well as the commit message and date:
Release a version by tagging it
Whenever your Excel file is ready to be released, the canonical way in Git is to tag your repository. GitHub allows you to do this by clicking on 0 releases (see screenshot under point 1) which will bring up the release dialog:
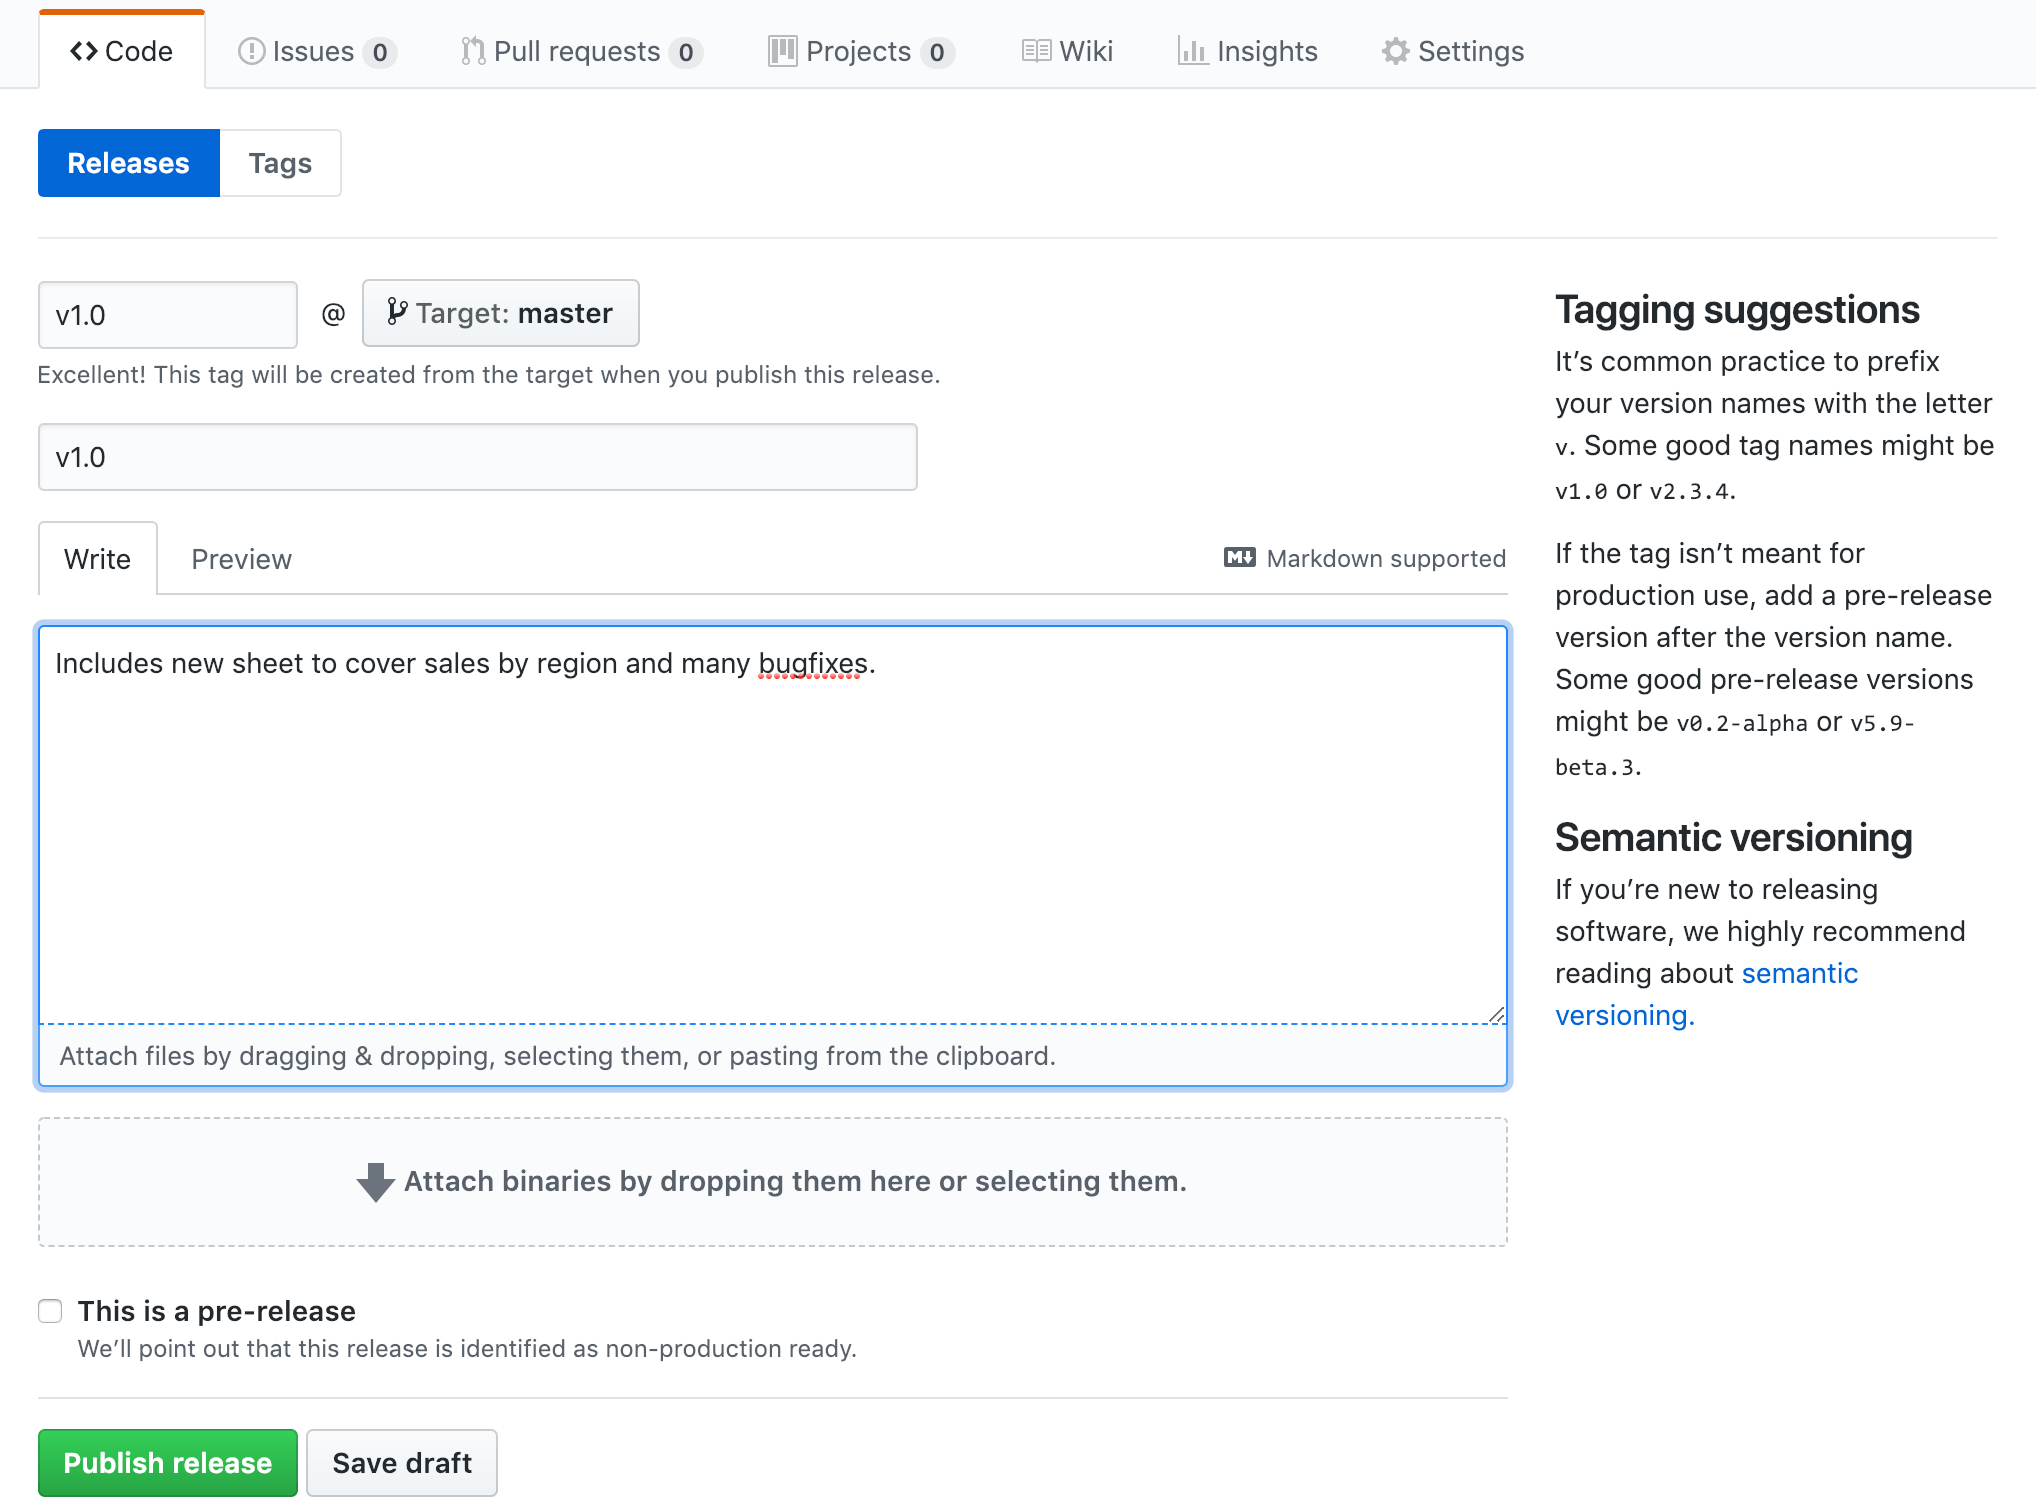
Type in a tag and title e.g. v1.0 for both and a description if you want.
Now, to distribute your Excel file, you may still want to have a version number in the file name so your users know what they are dealing with. To do that, copy the Excel file locally somewhere (outside of your Git repo!) and edit the name to include the version, then drag and drop it to where it says Attach binaries by dropping them here or selecting them. If this sounds like a manual and error prone process, you are right: we will see how we can automate this step in Part II of this blog post series.
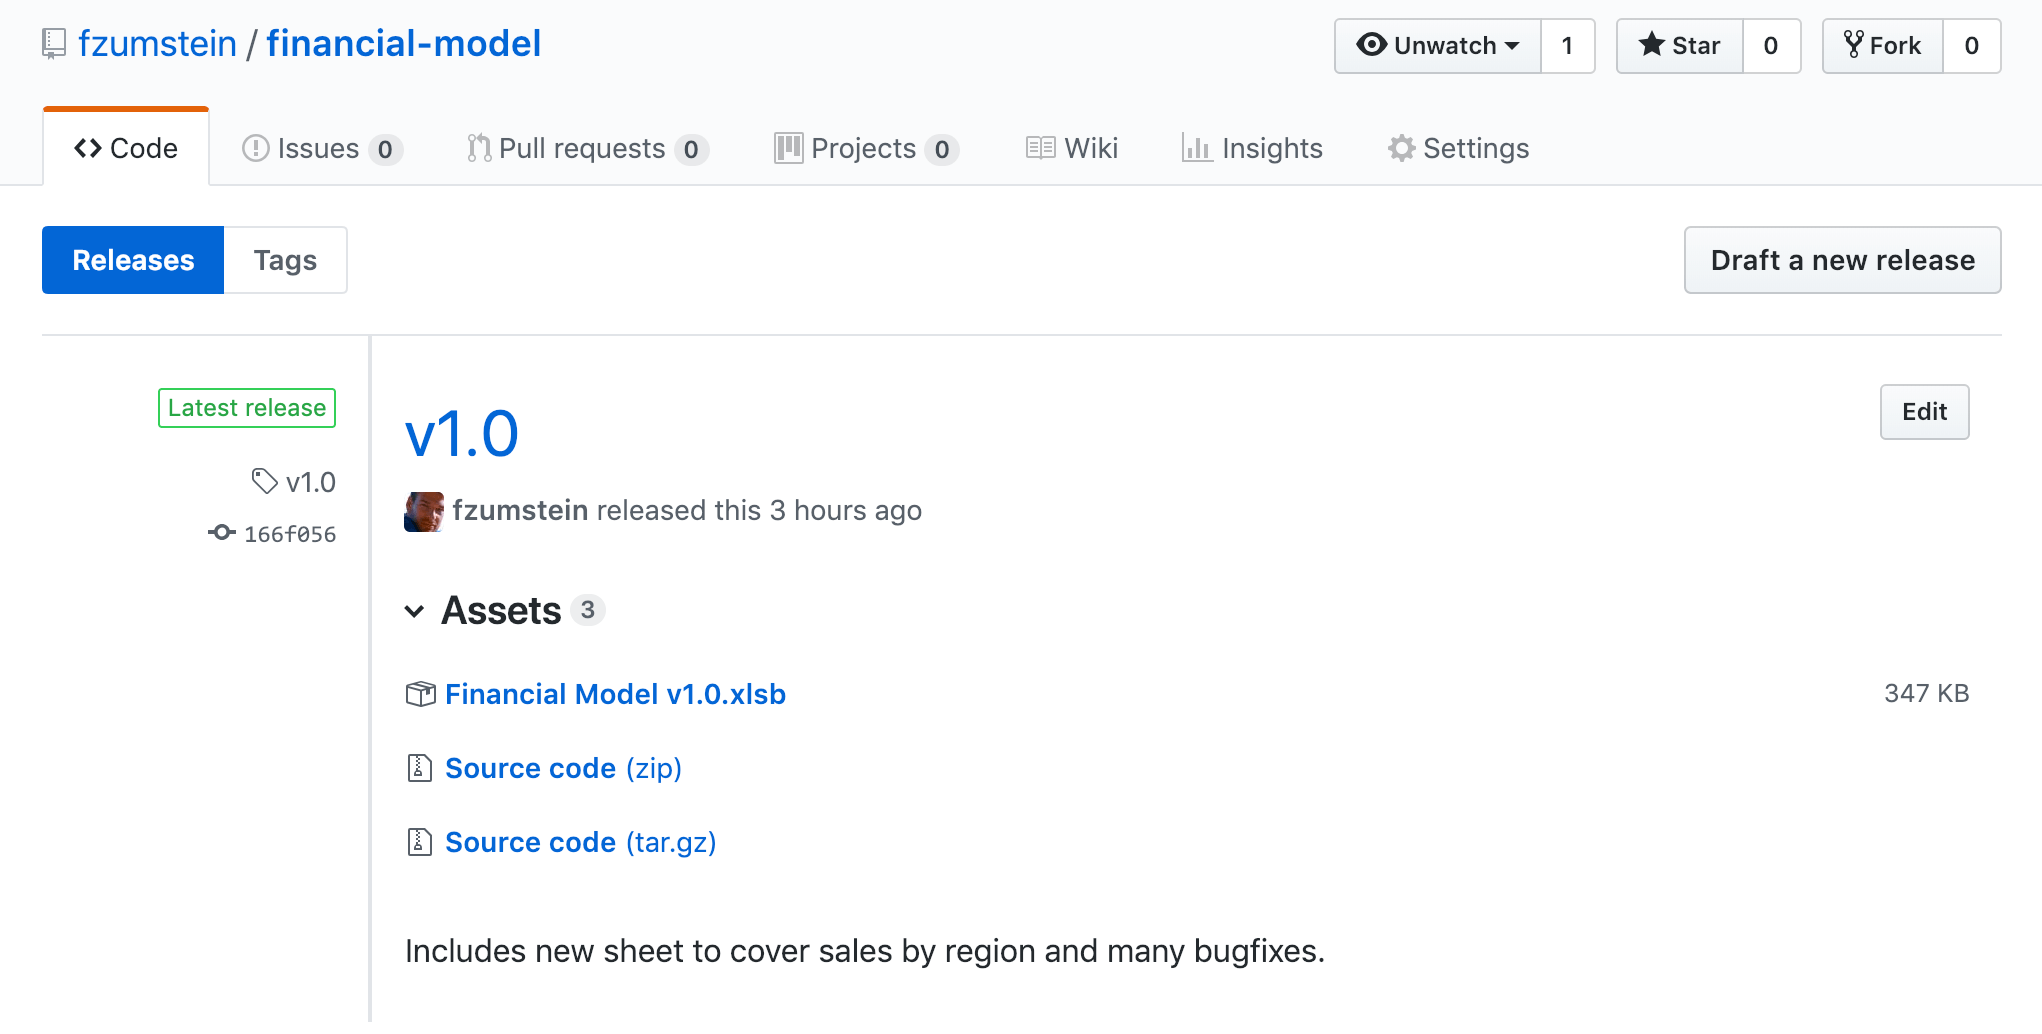
Click on Publish release to finalize and you can point your users to download the Excel file with the release tag without having to change the name in the actual Git repo:
Get approvals
Do you have an established process with your Excel files on your shared drive that requires someone to add a _approved_by_boss into your filename? Excellent! In GitHub, you will typically work on a feature branch followed by opening a pull request where you can select your boss to sign off. Since there is quite a lot to say about branching and pull requests, we leave the details for another blog post in this series.
Diff, diff, diff
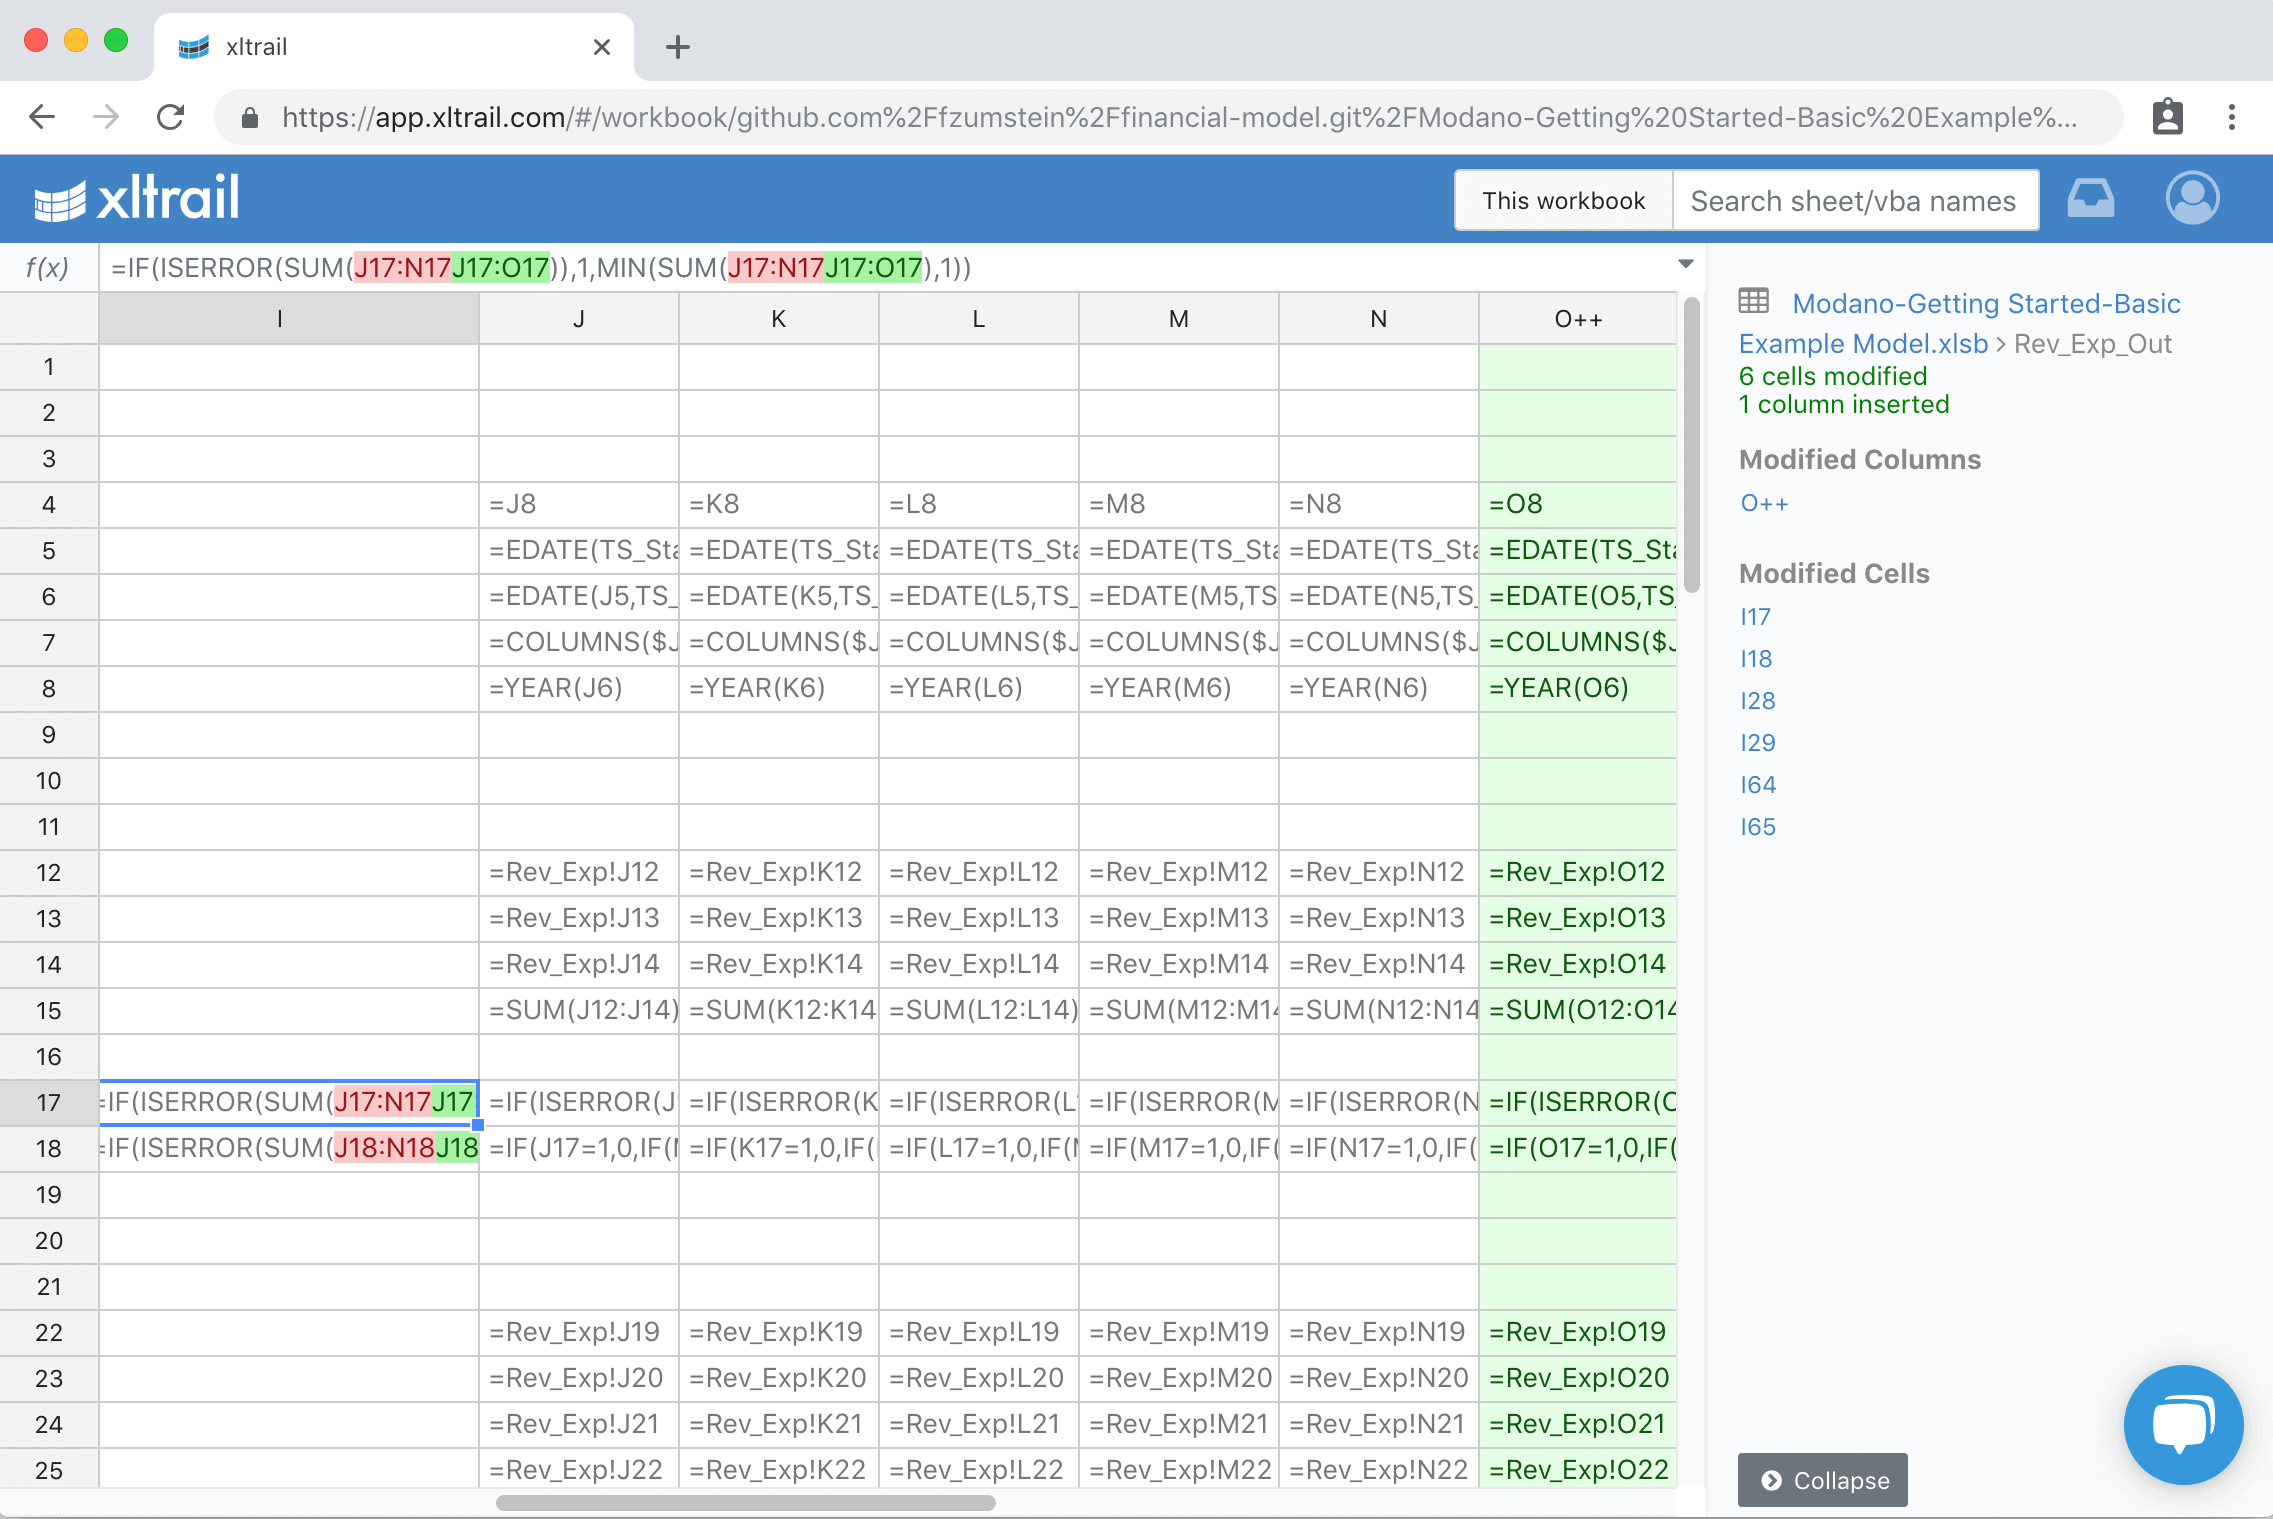
One of the things that make Git and services like GitHub so great is that you can see what changed from one version to another. That is, if you are working with text files. When committing Excel files, all you get from GitHub is really just a Binary file not shown when you click on a commit message. Fortunately, you can connect your Git repository with xltrail which will make the content and changes (so called “diffs”) visible, very much like GitHub shows them for text files:
Configure Git to work better with Excel
When working with Git and GitHub, you will usually work on a local copy (“clone”) by using some kind of client software. This may be the command line, GitHub Desktop or Atlassian SourceTree, or an integrated Git client that comes with your IDE or code editor. Two common issues that will arise are:
- Inadvertently committing temporary Excel files to Git. You can get around this by adding a
.gitignorefile, see a previous blog post for the details. - Also, if you make a lot of commits with reasonably big Excel files, they will quickly eat away a lot of storage on your local hard drive. Git LFS (large file storage) is a Git extension that takes care of this issue and is sometimes included in your Git client. To get all the details about Git LFS, see a previous blog post.
Conclusion
This has been a quick rundown of common issues and new concepts when using GitHub for Excel files. We will go into more details in the upcoming blog posts of this series. In the meantime, let us know what you found the most difficult thing when first mastering Git in the comments below!